How to Integrate Contact Microphones in Sound Design
Table of Contents
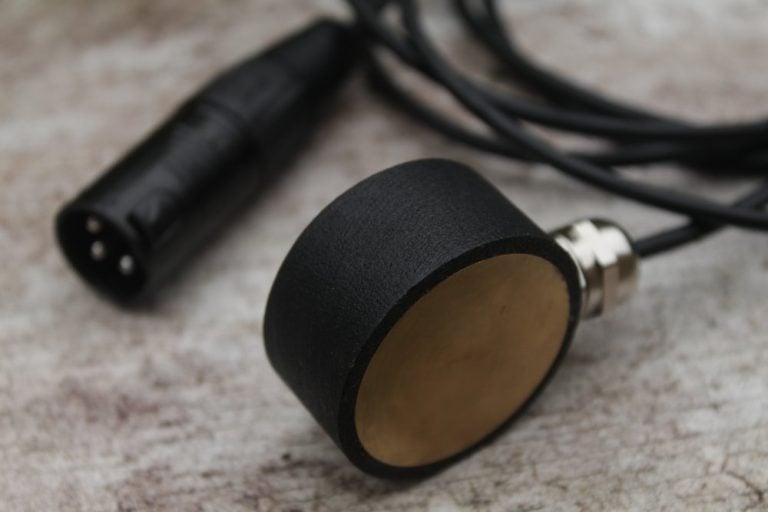
Contact microphones, also known as contact mics or piezo mics, are small devices that pick up vibrations from solid objects instead of sound waves in the air. In sound design, they open up a world of creative possibilities by capturing unique textures and tones that traditional microphones often miss.
Integrating them into your workflow requires understanding both the technical aspects and the artistic opportunities they provide.
What Makes Contact Microphones Different From Traditional Microphones?
Unlike standard microphones that record airborne sound, contact mics detect direct vibrations. This allows them to pick up subtle mechanical noises, resonances inside objects, or sounds hidden to the human ear. For example, placing a contact mic on a window might reveal deep rumbles when trucks pass outside, while attaching one to a metal pipe can produce eerie tonal drones.
How Can Contact Microphones Be Used in Sound Design?

Sound designers use contact mics to create distinctive audio effects for film, music, and interactive media. Some common applications include:
- Recording resonant objects like strings, metal sheets, or wooden boxes
- Capturing vibrations from surfaces for experimental percussion sounds
- Gathering organic textures for ambient soundscapes
- Highlighting hidden vibrations in machinery or natural environments
What Equipment Do You Need To Start?
To integrate contact microphones effectively, you’ll need a few essentials:
- A quality contact mic or piezo disc
- Shielded cables to minimize noise interference
- A preamp or audio interface with high impedance input
- Recording software to process and edit the captured sound
Some setups may also benefit from using phantom power or specialized preamps designed for piezo elements.
Where Should You Place a Contact Microphone?
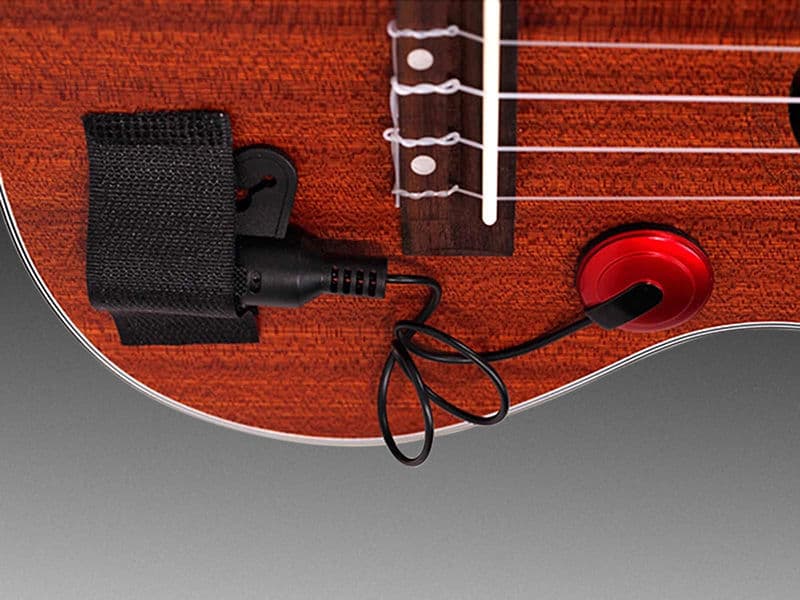
Placement plays a huge role in the results you get. Try experimenting with:
- Strings or instruments: attach the mic near the bridge to capture resonance
- Metal surfaces: place it at the center to pick up deep tones, or edges for sharper sounds
- Glass objects: attach carefully to avoid cracking and to capture subtle vibrations
- Everyday items: experiment with bottles, furniture, or appliances for unexpected textures
How Do You Process Sounds From Contact Microphones?
Raw recordings often need refinement. Common processing techniques include:
- Layering with traditional mic recordings for richer soundscapes
- EQ adjustments to remove low-frequency rumble or harsh highs
- Reverb and delay to add depth and atmosphere
- Time-stretching to transform short vibrations into evolving textures
What Challenges Come With Using Contact Microphones?
While powerful, contact mics also present some difficulties:
- They are highly sensitive to handling noise
- Not all surfaces resonate well, so placement requires trial and error
- Without proper shielding and impedance matching, recordings may sound thin or noisy
Addressing these issues with good cabling, preamps, and careful positioning ensures higher-quality results.
Why Should Sound Designers Consider Contact Microphones?
Contact microphones expand the creative palette by revealing sounds that can’t be captured otherwise. They allow designers to move beyond traditional recording and invent new sonic textures, making them an essential tool for experimental musicians, film audio professionals, and installation artists.