Your Complete Guide to Stereo Recording Techniques
Table of Contents
By practicing proper stereo recording techniques, an audio recording can mimic the natural phenomenon of triggering our human ears and brain to “locate” which direction a sound is coming from. This technique can elevate the listening experience of a person as either the left ear or right ear can hear a level difference in terms of volumes and sounds to further appreciate a recording. In some cases, stereo-recording techniques can also help a listener feel more immersed.
With that said, applying stereo recording techniques to sound recordings requires a few technicalities and accuracies to get the desired stereo effect. Not to worry though as starting on the world of stereo microphone techniques can be simple, especially with this guide to help you out.
What is a Stereo Recording Technique?

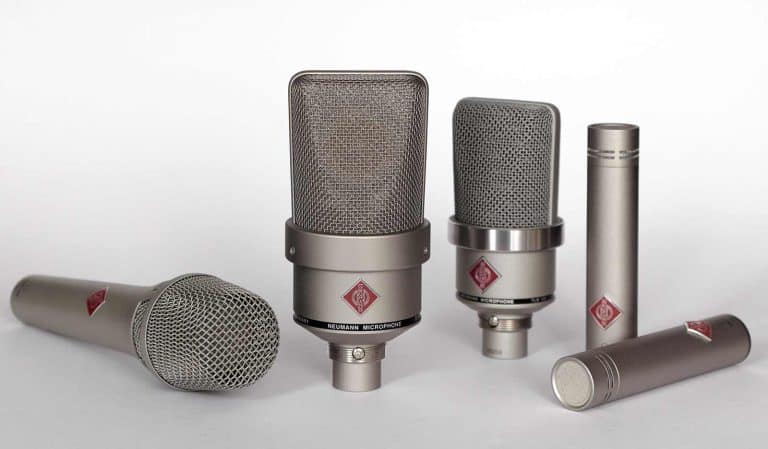
In the most basic sense, the stereo recording technique is the practice of using two microphones to record a single sound source simultaneously. The sound sources can be an instrument, a human voice, or other sounds in the environment. Mono sound signals from each stereo microphone will be assigned for the left and right channels of a stereo track thus creating a sense of “width” in the sound recording.
One microphone or sound source can be heard through the left speaker, monitor, or ear, and the other mic will be heard on the right. Putting these two mics together in the finished sound recording allows you to create a sense of stereo width that a mono recording does not have.
This slight level difference in sound between the left and right signals will be heard in studio monitors. This phenomenon is called the stereo effect and it can be observed in two ways:
Difference in Timing
When we listen to a sound recording and observe that a sound arrives earlier in one ear or speaker than the other, then there is a difference in timing. This is what we call interaural timing differences and it happens by planning microphones at different locations from the sound source.
By doing so, a sound source will be picked up first by the microphone nearer to it thus creating a difference in direct sound pickup. Even just a few milliseconds difference is enough to create a stereo width effect that is not achieved in mono sound recordings.
Difference in Frequency Balance
When a mic facing the sound source is angled at a different position from the other microphone, a difference in frequency balance occurs. The same acoustic guitar can sound different and have more “depth” and “width” because one microphone can be angled higher than the other.
What are the 5 Main Stereo Mic Techniques?

A-B Position
Starting with the most basic technique, we have the A-B position or spaced pairs. The A-B setup requires two omnidirectional mics, and these are usually small diaphragm condensers. This stereo miking technique will create a sound recording with a difference in frequency balance and a staggered difference in timing.
To achieve such sound, both mics should be pointing towards the sound source or instruments. There must be a difference of a foot or two between the mics thus, the alternative name is ‘spaced pair’. Make sure that the microphones are positioned properly as an AB setup can cause issues with phase cancellation when combining the stereo signal with mono.
X-Y Position
The X-Y position or XY stereo recording technique may have less of a stereo effect compared to the AB position. Unlike the AB stereo setup, the XY stereo recording technique will position the two microphones at the same point in space thus, no differences in timing will occur. However, the microphones will be angled differently to create a difference in frequency balance while avoiding any phase cancellation issues.
While different microphone types can be used for the XY stereo technique, the best ones are small-diaphragm condenser cardioid microphones. The stereo miking position of these microphones should be close to one another while facing each other. See to it that the cardioid microphones are forming a right angle with 90 degrees between them so it can create the optimal phase coherence while churning out a decent stereo field spread.
Alternatively, any angle between 90-135 degrees is also safe enough for the microphone capsules to coincide at a single point. Just take note that a wider angle will create a wider stereo image.
Due to the position of the microphones, the XY setup is a coincident pair and mono compatibility would not be an issue. With that, if you are limited to a sound stage with just a single channel output, then the XY stereo technique may be the best one to apply.
M-S Position
The M-S position or mid/side recording is one of the most interesting stereo miking techniques in the list. By simply using two directional microphones with different polar patterns and ample positioning, the mid/side stereo microphone technique can achieve a wide stereo image of three techniques: the added stereo width of the A/B or spaced pair, the mono compatibility of the X/Y stereo microphone, and the more advanced Blumlein pair stereo microphone technique that allows you to increase the room ambiance.
With this, the mid/side stereo microphone technique will need to use two mics with varying polar patterns. The mid and side mics to be used can be cardioid or omnidirectional microphones or the small diaphragm condenser while the large diaphragm condenser must be a figure-8.
Similar to the XY stereo technique, the side mic will have to be placed at a 90-degree angle from the instrument or source. The side mic must have the figure-8 polar pattern and be placed sideways from the source so it can record audio on both sides. The mid mic will be positioned on top or below the figure-8 side mic but will be pointed directly towards the source.
With such a position, you can see how the mid/side stereo miking technique can mimic the sounds of the spaced pair and coincident pair stereo microphone techniques. Additionally, the audio signals from the mid and side mics will be routed through a small matrix circuit that helps create a distinct sound for the left channel output and the right channel output.
ORTF Position
The ORTF stereo microphone technique is similar to the XY position in such a way that both mics are placed close to each other. However, the ORTF technique does not have the mic heads angled or facing one another. Rather, the butt ends of the mics would be the ones acting as a near coincident pair.
Similar to all the other techniques listed here, the ORTF position makes use of two directional microphones, preferably small diaphragm condenser mics. The left microphone and right microphone must have an equal space of 110 degrees spread outward from one another with their capsules spaced 17cm apart. The near coincident positioning allows the microphones to create a wider stereo image while picking up less ambient room sounds. This also helps strike the right balance between direct sounds and diffuse sound fields.
Blumlein Stereo
Unlike the rest of the techniques listed, the Blumlein stereo or Blumlein pair uses bidirectional microphones. Each bi-directional mic must have a figure-8 polar pattern to achieve a stereo image with more ambiance it and separation compared to the XY technique. Using a cardioid microphone at each stereo side channel with a figure-8 polar pattern also creates a stereo image with an off-axis attenuation. Thus, you can also pick up recordings with completely isolated but coincident stereo fields and center images.
Final Note

These five stereo microphone techniques may be the simplest and most basic of them all but are also arguably the best ones to use in varying recording settings. For best results, we encourage you to try varying techniques and configure them to your preference.
Frequently Asked Questions
What is a stereo image?
To create a sense of space, depth, and width of field for the listener, stereo images are manipulated. These are the manipulation of signals within a 180-degree field so that perceptions are created within the locality or vicinity. A center microphone can be placed, side microphones, and so on just to manipulate signals from the source within a field.
Do stereo miking techniques always use two microphones?
Most stereo miking techniques make use of two microphones because of the depth and width they can create within a field. Depending on the technique you want to apply, you would have to place an optimal distance between the two or angle them properly toward each other and the instrument or source.
What do you need for stereo miking?
A basic setup would require you to first order cardioid microphones. A cardioid mic is preferred because its polar patterns have full sensitivity on-axis and are categorized as unidirectional. You will also need a microphone stand to keep the microphone in place without the field of recording.
What is the NOS Stereo Technique?
NOS stands for Nederlandse Omroep Stichting and is most similar to the ORTF stereo technique. However, this method uses two cardioid microphones that are placed 30cm apart and angled at 90 degrees from one another. With such a position, the NOS technique creates a more ambient recording that’s perfect for recording group performances and acoustic instruments.